Introduction
Collagen type I is the most common fibrillary collagen found in skin, bone, tendons and other connective tissues, accounting for around 90% of the body’s total collagen. Collagen type I-based hydrogels are ideal for 3D printing and bioprinting applications due to their excellent biocompatibility, biodegradability and controllable printability. When using highly-concentrated fibrillary collagen hydrogels, structure integrity is guaranteed through the production of self-standing scaffolds with good mechanical performance, without the need of a self-supporting bath or further addition of crosslinkers.
The present protocol provides instructions for preparing a Fibercoll-FlexA® ink and the 3D printing of scaffolds that are seeded later on with human dermal fibroblasts. Fibercoll-FlexA® is an acidic hydrogel of highly purified, fibrillary collagen type I that can be neutralized after 3D printing, giving rise to mechanically highly stable collagen scaffolds. The stiffness of the scaffold can be adjusted by dilution of the ink and cells can be seeded on top of the scaffold once its neutralization has been completed. Due to its excellent biological and mechanical properties, this formulation can be used as a pure substance without using other additives or chemical crosslinking.
Materials
Reagents and consumables
- FiberColl-FlexA® bioink kit including 3 ml FiberColl-FlexA® loaded in a 5 ml syringe and 20G stainless steel straight dispensing tip
- Sterile distilled water
- Sterile 0.05 M NaOH
- Two sterile eccentric 10 ml syringes
- One sterile female-female luer connector
- 5 cc bioprinting syringe
- 5 cc red adjustment piston
- Cells
- Complete cell culture media
- 1X Phosphate-Buffered Saline (1X PBS)
- Trypsin/EDTA solution
- Culture dish
- Serological pipettes
- Tips for micropipette
- Live/Dead viability/cytotoxicity kit
- Hoechst 33342
- Trypan blue solution
Equipment required
- REG4Life 3D bioprinter
- Class 100 laminar flow cabinet
- Micropipette
- Pipetor
- Hemocytometer
Methods
All steps must be performed inside a laminar flow cabinet using sterile materials and reagents and following aseptic techniques to guarantee the fabrication of scaffolds free of endotoxin/bacterial contamination.
Recommended FiberColl-FlexA® working concentrations for extrusion-based 3D printing range between 2-5%. In the following protocol, a concentration of 2.5% will be used.
- Preparation of 2.5% FiberColl-FlexA®:
- Unpack the syringe containing the Fibercoll-FlexA® hydrogel, remove the syringe cap, connect a luer connector and slowly push plunger in until a small drop of collagen forms at the tip of the connector.
- Then, connect it to a sterile, 5 cc empty sterile syringe and slowly push plunger back and forth, transferring the content from one syringe to another for 20 times with the scope of generating a homogeneous mixture.
- In order to dilute FiberColl-FlexA® hydrogel from 5% to the working concentration (2.5%), mix Fibercoll-FlexA® hydrogel with sterile distilled water in a 1:1 proportion. To that end, leave 2.5 ml of Fibercoll-FlexA® in one of the syringes, connect to another containing 2.5 ml of sterile distilled water, and push plunger back and forth for 40 times in order to obtain a homogeneous dilution.
- Transfer the ink to a sterile 5 cc syringe compatible with a REG4Life 3D bioprinter (REGEMAT 3D). If formed, air bubbles can be removed by centrifugation after sealing the syringe with a cap.
- 3D printing of Fibercoll-FlexA® scaffolds:
- Switch on the REG4Life 3D bioprinter, connect it to the computer and launch REGEMAT 3D Designer Software (REGEMAT 3D). Then click the “Connect” button.
- Replace the syringe cap by a 20G ID stainless steel straight dispensing tip and load the bioprinting syringe in the printhead.
- Proceed with the laser calibration by choosing the corresponding tool/printhead and its allocation in “Header Configuration” and by clicking “Calibration” in the REGEMAT 3D Designer Software. Ensure that the glass bed is installed on the printing platform for the calibration. Once calibration is finished, press “Accept” and do a Homing by clicking the “XYWZ” button in the “Movements” tab.
- Remove the glass bed, insert the cell culture dish into its adaptor and then secure it in the printing platform. Configure the printing bed by pressing Settings > Platform configuration. Then select “Petri” dish and indicate its diameter. Press “Accept”.
- Adjust the distance between the tip of the syringe and the surface of the printing bed to approx. 0.30 mm clicking “Header Configuration” and “Fine Calibration”. Press “Accept” and then do a homing by clicking the “XYWZ” button in the “Movements” tab.
- Specify T1 nozzle diameter (0.58 mm) in the “Tool Configuration” section within “Object viewer” tab.
- Proceed with the generation of 3D constructs by loading the .stl file or the Gcode.
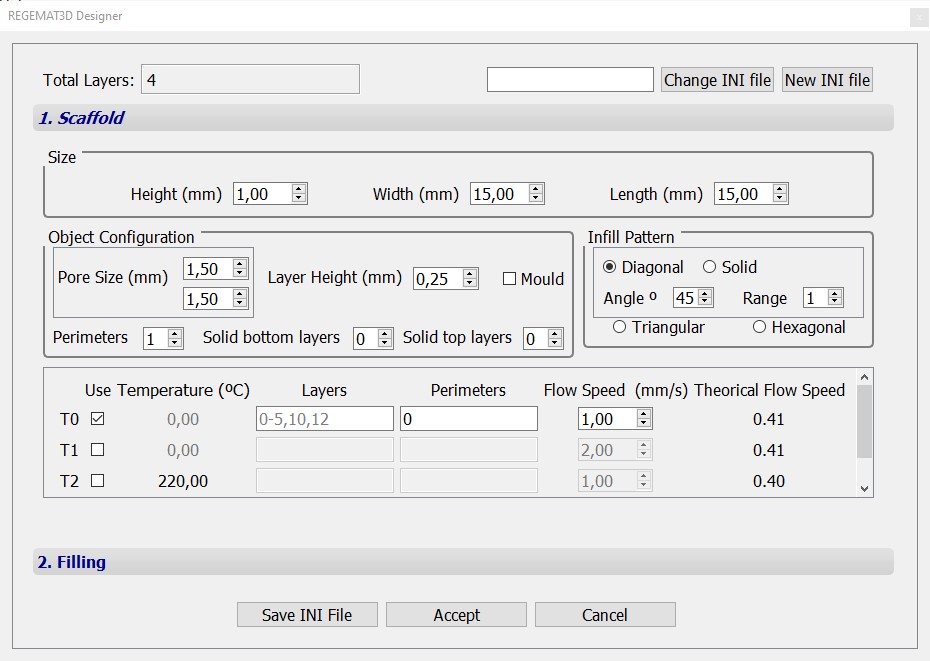
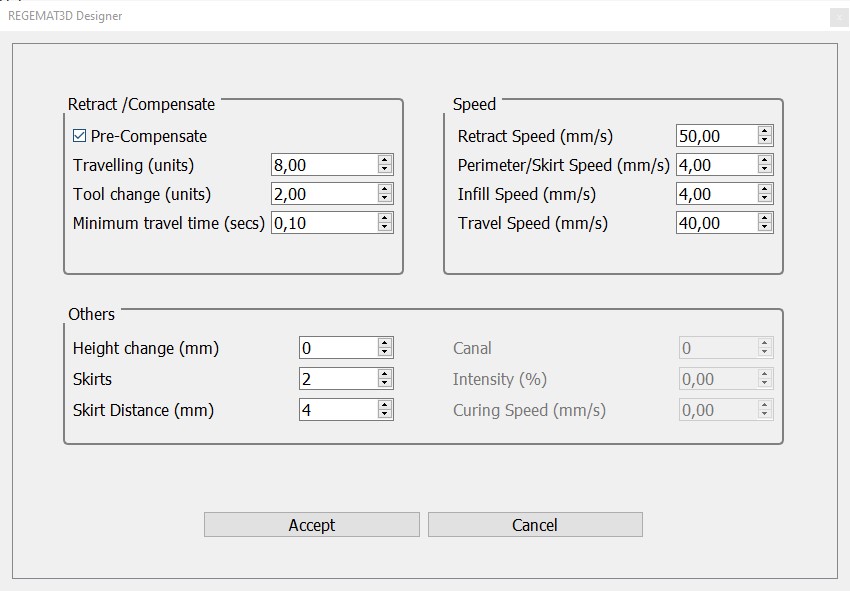
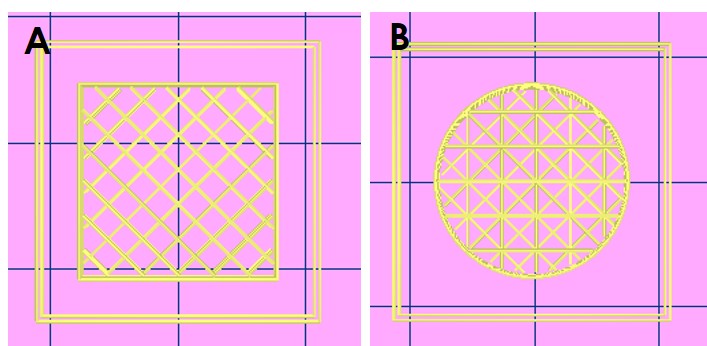
The following 3D printing parameters have been optimized for generating porous Fibercoll-FlexA® scaffolds with different geometries:
Object configuration
Object A
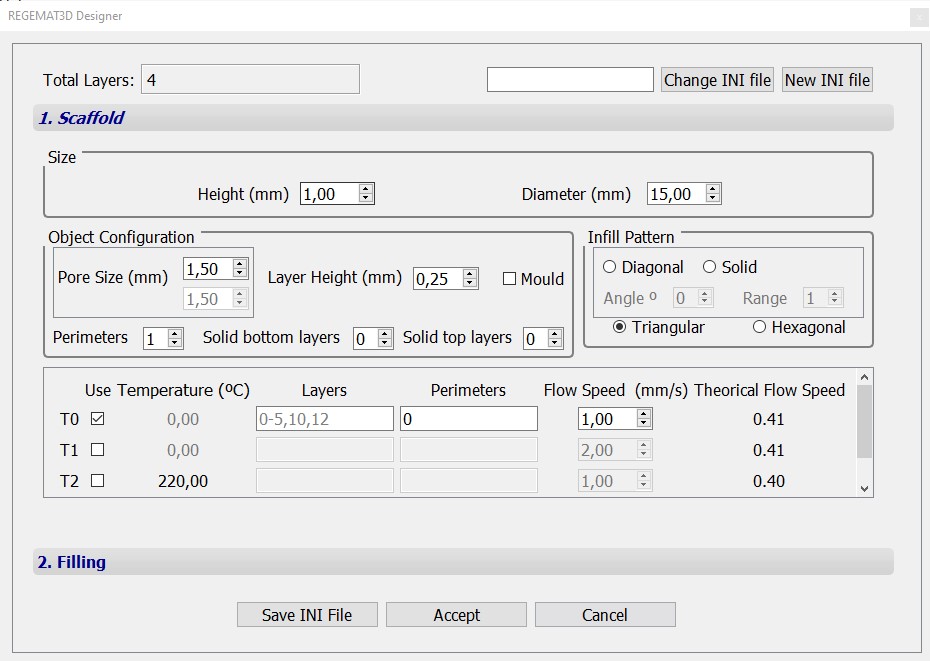
Object B
Extra configuration
Printable object
- Neutralization of Fibercoll-FlexA® scaffolds and cell seeding
- Following printing, neutralize the scaffold by covering it completely with sterile 0.05 M NaOH solution for 30 min at RT.
- Discard NaOH and wash the scaffold by immersing it in 1X PBS for 15 min. Do 5 washes in total.
- Discard 1X PBS and cover the scaffold completely with complete cell culture media for 30 min at RT. If using media containing phenol red, the scaffold should have turned rose at this moment. On the other hand, if the scaffold turned fuchsia pink or white, carry out two additional 30 min washes before cell seeding.
- After removing the media, the scaffold is ready for cell seeding. Add the required volume of cell suspension to cover its entire surface by seeding 100,000 cells/cm2. Leave the scaffold in the cell culture incubator at 37ºC and 5% CO2-balanced atmospheric air during 60 min to ensure cell attachment. Then, add enough cell culture media to completely submerge the scaffold.
- Culture cells for the desired period of time in the cell culture incubator, performing cell media changes three times per week.
- Cell morphology and proliferation can be analyzed at different time points by confocal microscopy imaging after Live/Dead staining. Detailed protocol for Live/Dead+Hoechst staining can be found in the labmethod “Scaffold biocompatibility assessment”.
Results
3D constructs
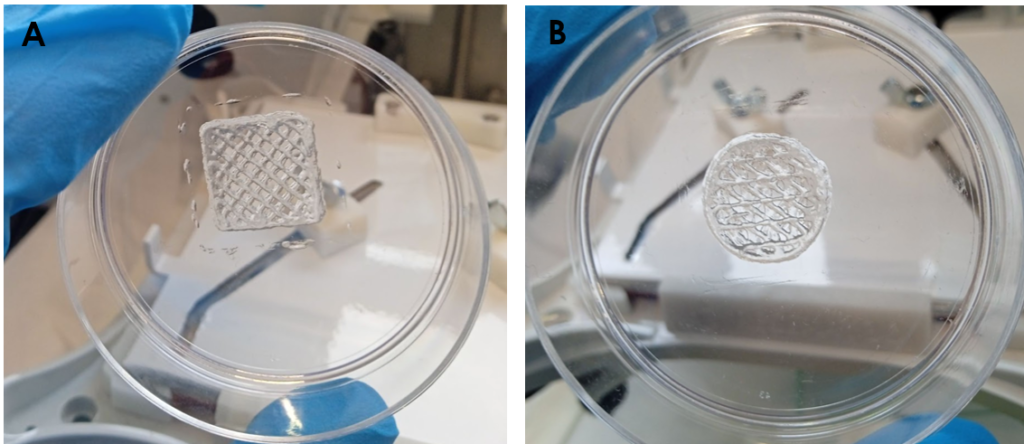
Figure 1. Macroscopic images of cubic (A) and cylindric (B) FiberColl-FlexA® scaffolds with different infill patterns using the printing parameters specified in the methods section, immediately after the 3D printing process.

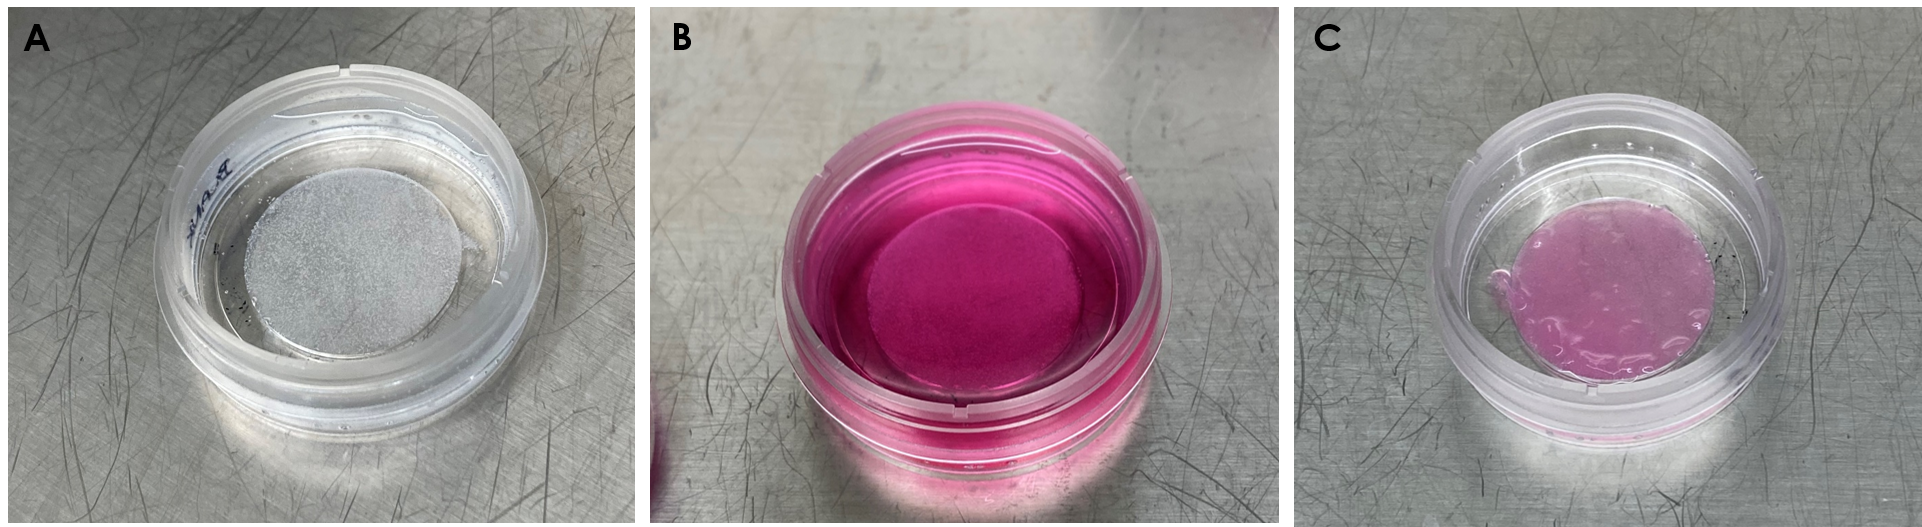
Figure 2. A fiberColl-FlexA® solid cylindric scaffold after the 3D printing process (A), subsequent neutralization (B) and fibroblast cell seeding on the top of the matrix (C).
Biocompatibility assay
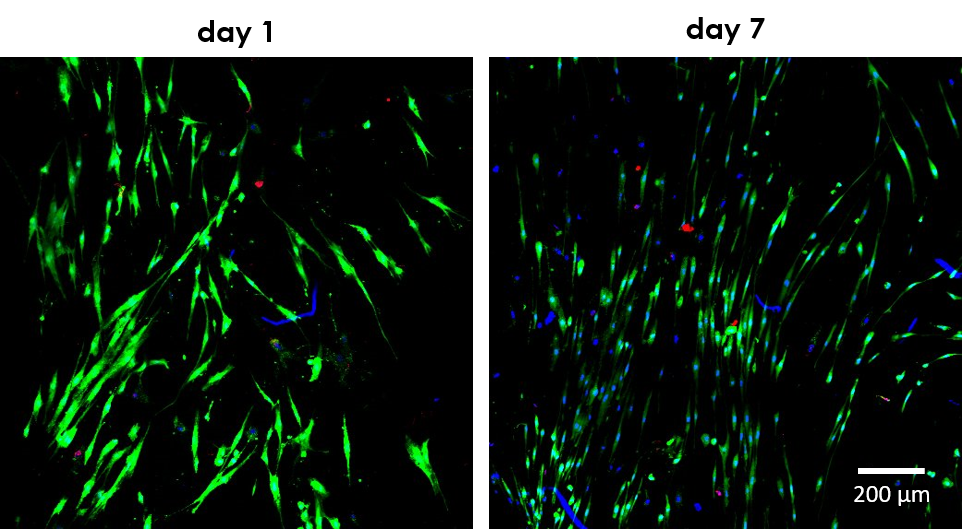
Figure 3. Representative images of Live/Dead cell viability assays acquired with a Zeiss LSM 710 confocal laser microscope in solid cylindrical scaffolds (35 mm diameter x 1 mm height). Human primary fibroblasts display high viability, enhanced proliferation and typical spindle-shape morphology at day 7 of culture in Fibercoll-FlexA® hydrogel with the REG4Life bioprinter. Nuclei were counterstained with Hoechst 33342.
References
- García-Villen et al. Int J Bio, 2023;9(3):712
| Number | Category | Product | Amount |
|---|
9 thoughts on “3D printing of Fibercoll-FlexA® scaffolds for the culture of fibroblasts”