INTRODUCTION
Alginate is a FDA-approved natural polysaccharide extracted from brown algae with multiple applications in the food, cosmetic, and pharmaceutical industries. Its outstanding features including high biocompatibility, ease of gelation, tailorable rheological properties and degradation kinetics make it ideal for 3D bioprinting applications. Alginate hydrogels can be ionically crosslinked with various divalent cations including Ca2+. In addition, it can be blended with other hydrogels such as collagen or nanocellulose to enhance the mechanical properties of the final construct, or it can be enriched with additives to improve cellular adhesion and functions.
The present labmethod covers the materials, equipment and a step-by-step protocol to fabricate alginate scaffolds using 3D coaxial bioprinting. Given that the coaxial syringe enables different solutions such as sodium alginate and CaCl2 to flow in the inner and outer channels of its concentric nozzle, converging at the end during the printing process, it is specially indicated for the fabrication of complex scaffolds made of either core-sheath or hollow fibers.
MATERIALS
Reagents and consumables
- Alginate HiG (Mw and M/G ratio optimized for extrusion-based 3D bioprinting)
- 1X Phosphate-Buffered Saline (PBS)
- Calcium chloride solution (CaCl2)
- Agarose
- Cell culture dish
- Tips for micropipette
- Syringes with luer-lock adapter
- Serological pipettes
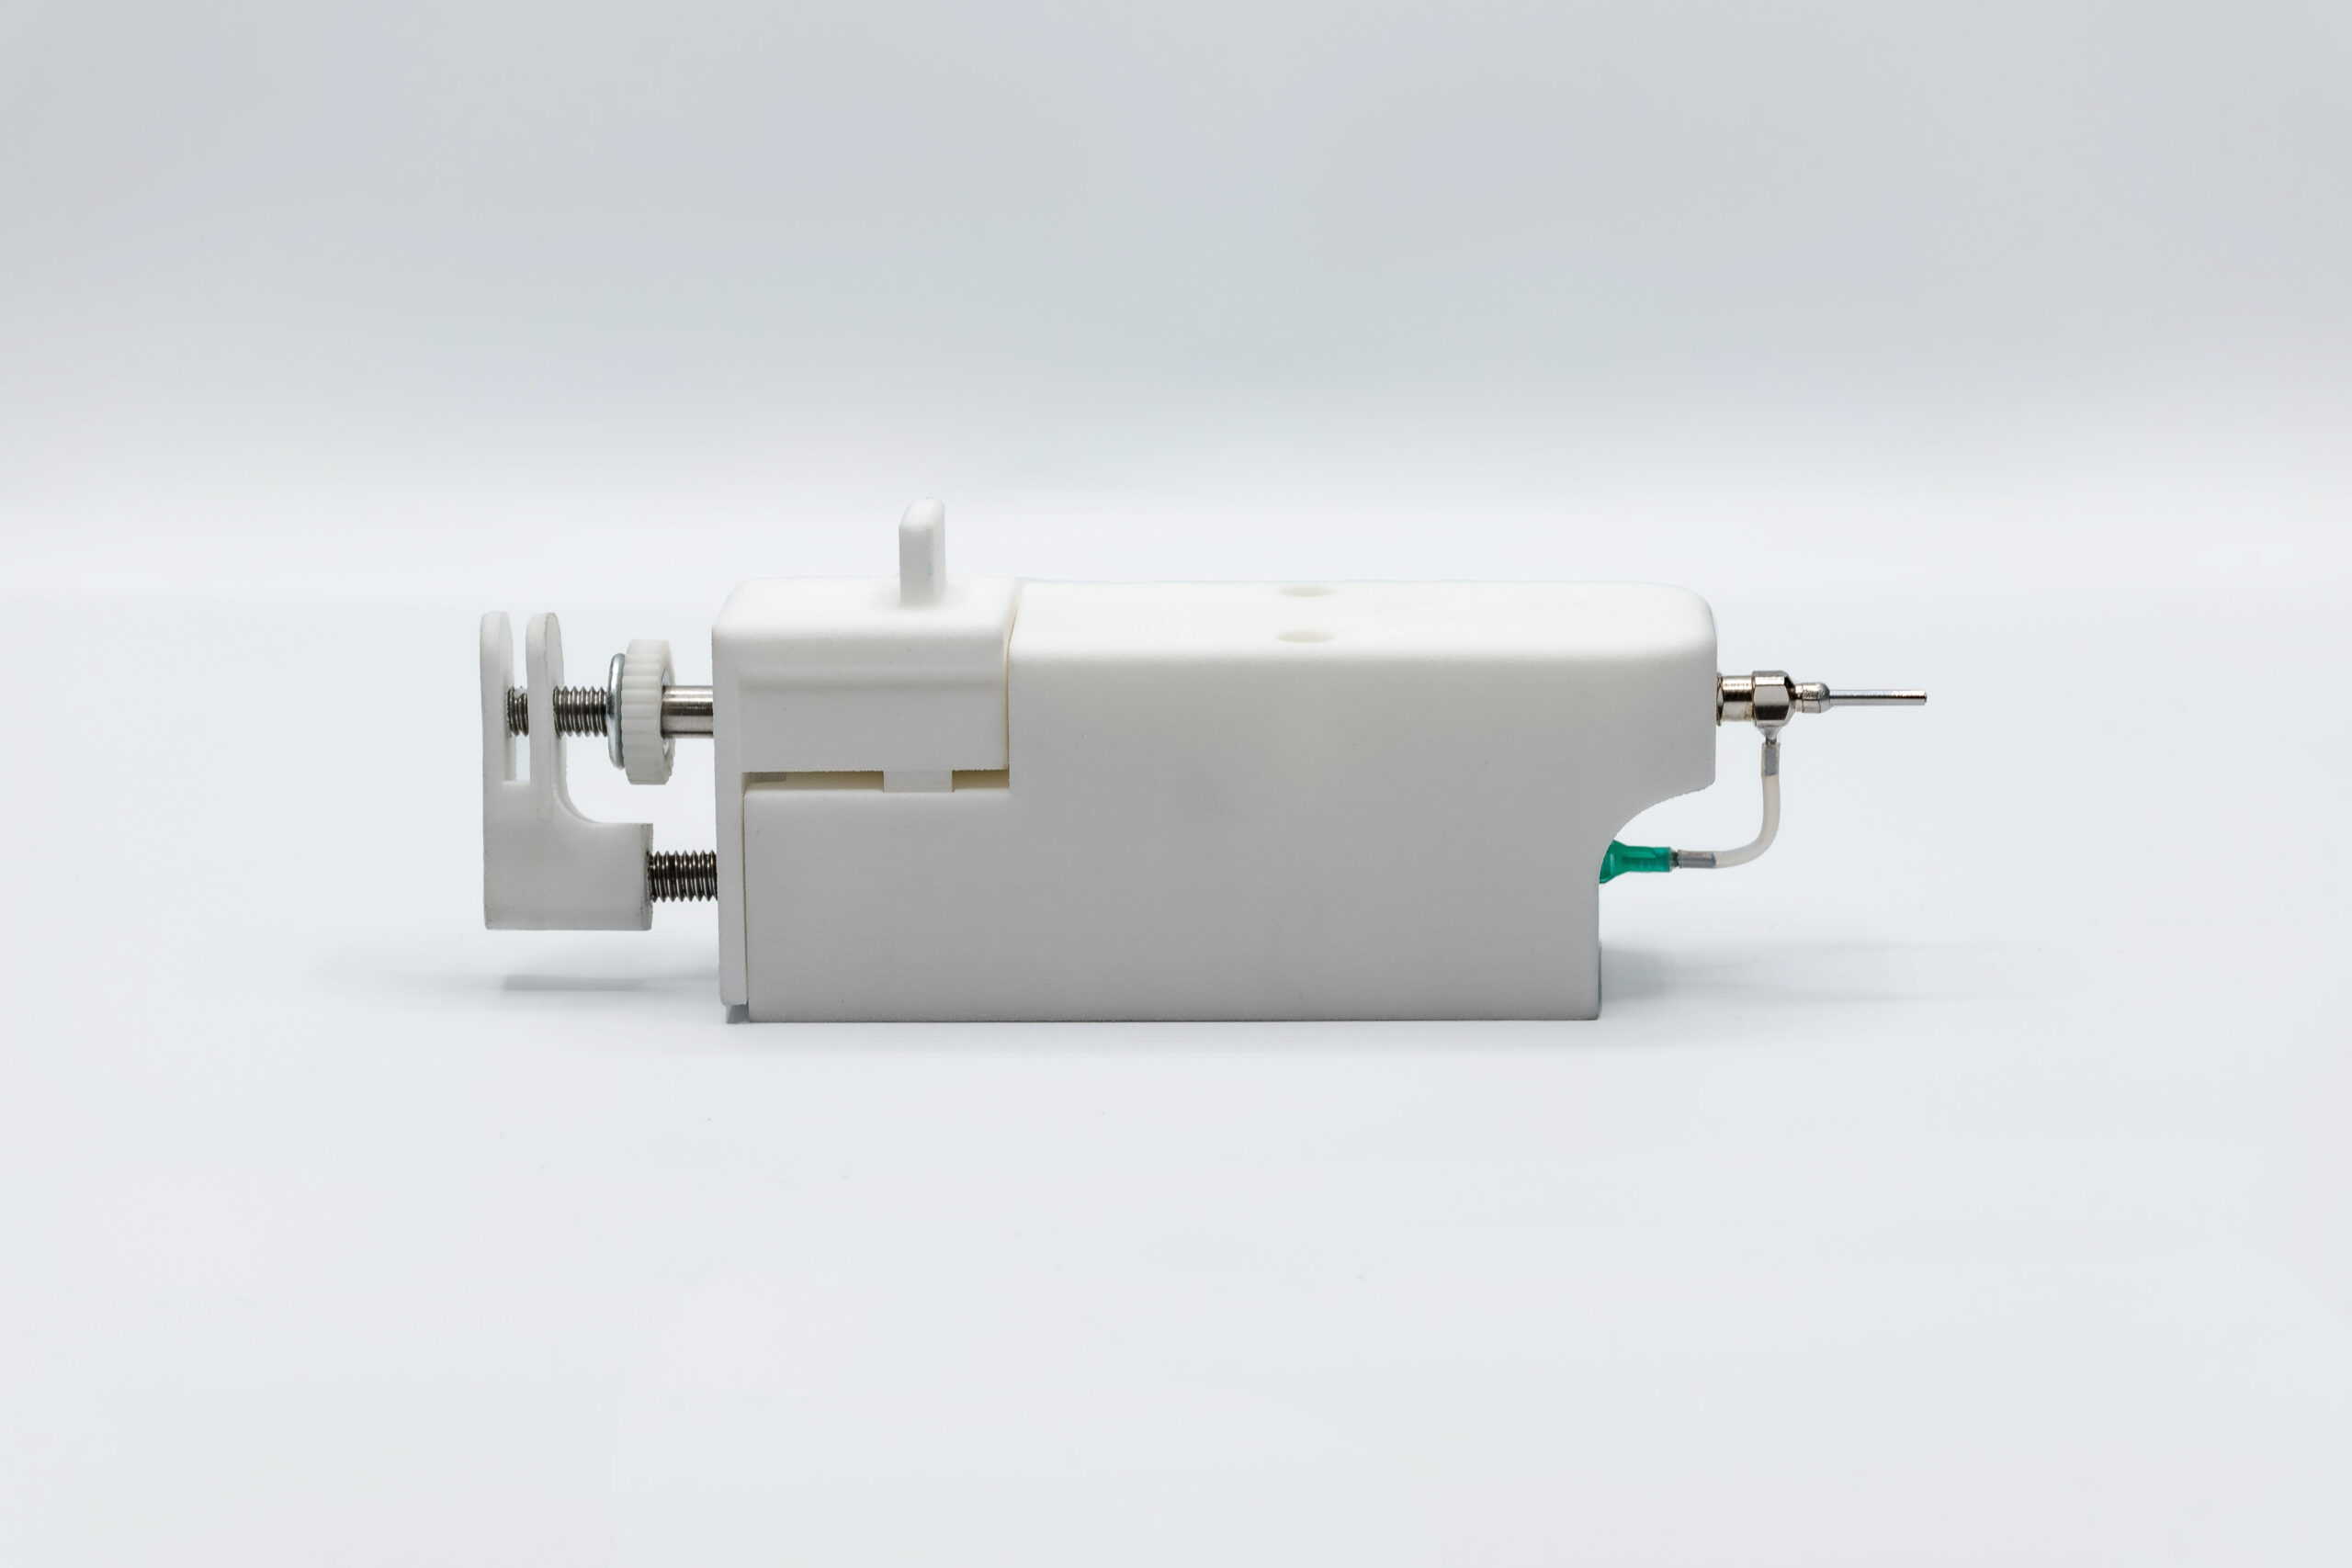
- Coaxial module for the bioprinter
- Coaxial needle
- Stainless steel straight tip
- Conical tubes
- Magnetic stir bar
Equipment required
- REG4Life 3D bioprinter
- Micropipette
- Pipetor
- Magnetic stirrer hot plate
- Precision balance
METHODS
- Preparation of the Alginate and the agarose base:
- Prepare a 4% HiG alginate solution by dissolving powdered alginate HiG in 1X PBS. Leave in agitation at 50°C ON.
- Prepare a 25 mM CaCl2 crosslinking solution in 1X PBS.
- Prepare a 2% agarose + 3% CaCl2 solution in water, pour it in a cell culture dish for generating a printing base. Leave it solidifying at 4ºC. This bed will favor the attachment of the pre-crosslinked alginate filament to the printing surface since it presents a reduced attachment into plastic labware.
- Coaxial syringe filling and placement in the REG4Life bioprinter:
- Fill a 3 ml syringe with hydrogel prepared in step 1.1. The hydrogel will be extruded through the inner channel of the nozzle.
- Fill a 10 ml syringe with 25 mM CaCl2 crosslinking solution prepared in step 1b. The crosslinking solution will be extruded through the outer channel of the nozzle.
- Remove the coaxial module from the REG4Life 3D bioprinter (REGEMAT 3D) using an alley key and place syringes into corresponding locations of the module.
- Add the corresponding tips (coaxial needle for the syringe containing the alginate and a straight stainless steel for the CaCl2 solution) and connect them through the tube.
- Place the coaxial module in the printhead again: it needs to be screwed in the highest position, or lowering the printing bed. Otherwise the needle might hit the printing bed during calibration.
- Proceed with the laser calibration by selecting the position of the printhead in the Header Configuration and clicking Calibration.
- Place the petri dish containing the agarose+CaCl2 printing base on the printing bed and adjust the distance between the tip of the coaxial needle and the printing bed to 0.35-0.45 mm with Header Configuration > Fine Calibration.
- 3D printing parameters:
- Example for generating a solid cylinder inside a 60 mm diameter culture dish using REGEMAT 3D Design software.
Object configuration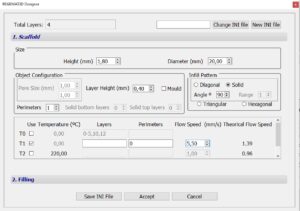
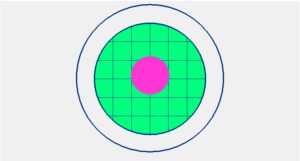
Extra configuration

Printable object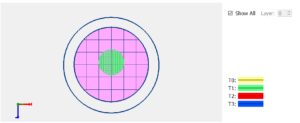
| Number | Category | Product | Amount |
|---|