INTRODUCTION
Synthetic hydrogels are chemically defined animal component and pathogen-free hydrogels with tailored biological, mechanical and rheological properties for 3D bioprinting. Their synthetic origin avoid batch to batch variations, giving users the confidence to achieve reliable and consistent results with potential for clinical translation.
Amongst the different options in the market, VitroINK® arises as a new family of sterile, ready-to-use, xeno-free tunable hydrogels for 3D bioprinting. Closely mimicking the natural extracellular matrix (ECM) environment, VitroINK® gives outstanding balance of biological functions and printability to establish robust 3D culture platforms in high resolution to advance drug discovery, tissue engineering, cell therapy and personalized medicine.
VitroINKs® are stable at room temperature, neutral in pH, permeable and transparent, being compatible with different imaging systems to enable an ease monitoring of cells after bioprinting. Due to their unique shear-thinning behavior and rapid elastic recovery, VitroINKs® maintain high shape fidelity after extrusion without the need of thermal or chemical crosslinking methods, guaranteeing cell viabilities close to 100%. Given the tunability of their biological, mechanical and rheological properties through the incorporation of multiple biological components such as functional ligands and adhesive peptides to support the culture of many cell types, and through changes in their concentration, VitroINKs® are considered highly versatile systems with high potential for applications in the biomedical field.
The present protocol describes the materials, equipment and a steps required to fabricate VitroINK® 3D scaffolds using extrusion-based 3D printing.
MATERIALS
Reagents and consumables:
- VitroINK® 3D starting kit including: VitroINK® 3D (3 ml) loaded in a syringe and VitroINK Mixing kit (Fig. 1A) including the cell mixer dispenser, 1 ml syringe, 3 ml syringe, connectors and mixing head.
- 5 cc bioprinting syringe
- 5 cc red adjustment piston
- 25G conical polypropylene dispensing tip
- 100 mm diameter cell culture dishes
Equipment required:
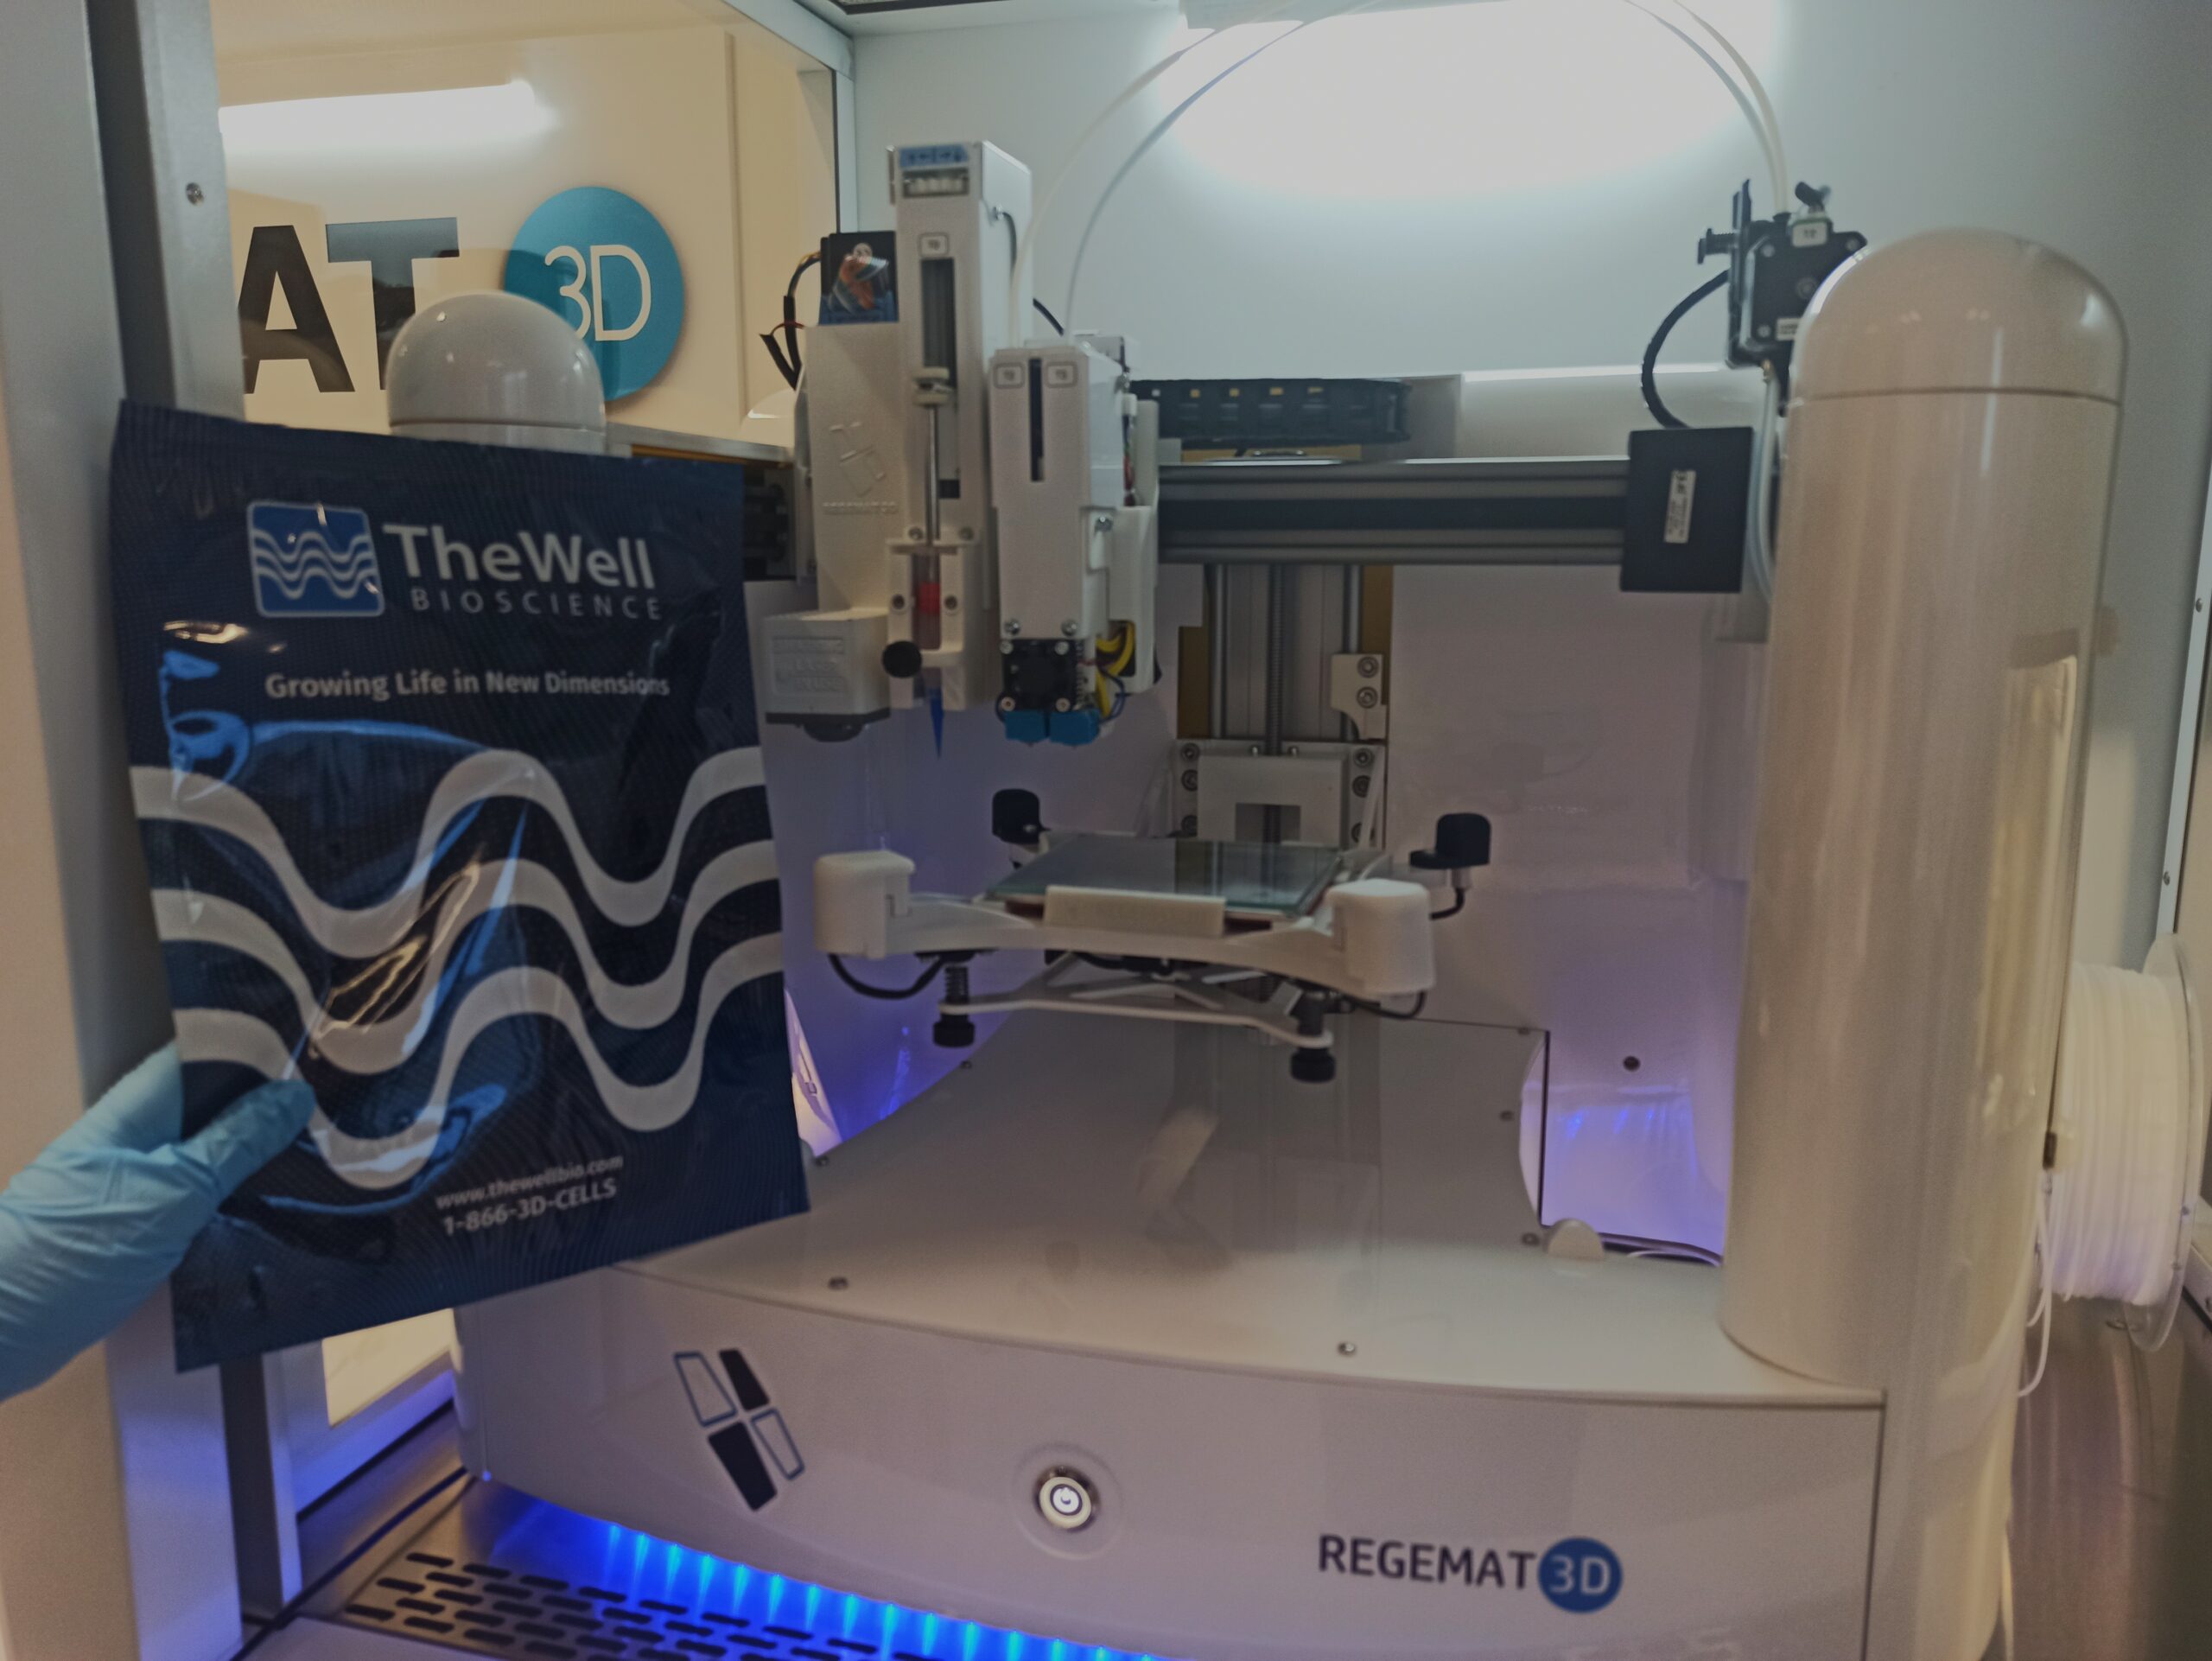
- REG4Life 3D bioprinter
- Class 100 laminar flow cabinet
- P1000 micropipette
- Cell culture incubator
METHODS
Recommended VitroINK®:cell suspension mixing ratios for extrusion-based 3D bioprinting are 3:1 and 10:1 (v/v), depending on the targeted stiffness. In the following protocol, we describe the fabrication of cell-free scaffolds through 3D printing, substituting the cell suspension by just cell media to dilute the hydrogel for the fabrication of scaffolds softer than 45 kPa.
All steps must be performed in a biosafety or laminar flow cabinet, using sterile materials and reagents and following aseptic techniques to prevent contamination of the printed scaffold.
Dilution of VitroINK® 3D and loading into the 3D printing syringe:
Follow the steps schematized in figure 1:
- Fill a 3 ml syringe with 1 ml of cell media, adding 200-300 µl extra volume to fill the empty space of the connector, tubing and mixing head
- Connect the cell syringe to the female end of the connect tubing. Apply pressure to the syringe to fill the empty space of the tubing until a small drop of cell media dispenses at the male end of the connect tubing
- Connect the VitroINK® 3D syringe to the female end of the T shape connector (a), the male end of the tubing to the cell syringe to the female end of the T shape connector (b) and the mixing head to the male end of the T shape connector
- Turn the “OFF” valve of the connector up towards the VitroINK® 3D syringe and then gently apply pressure to the cell syringe until a small drop of medium shows up at the end of the mixing head
- Turn the “OFF” valve of the connector towards the connecting side of the syringe containing 1X PBS and then gently apply pressure to the VitroINK® 3D syringe until a small drop of VitroINK® 3D medium comes out from the end of the mixing head
- Clip both the VitroINK® 3D syringe and the cell syringe to the dispenser
- Insert the piston into the printing syringe and connect it to the mixing head. Turn the “OFF” valve of the connector to open the connection between the VitroINK® 3D syringe, the cell syringe and the mixing head. Gently press the dispenser to mix the VitroINK® 3D and cell culture into the empty cartridge. Wait 10-20 min for the mixture to become stable. The cartridge is now ready for printing on the bioprinter
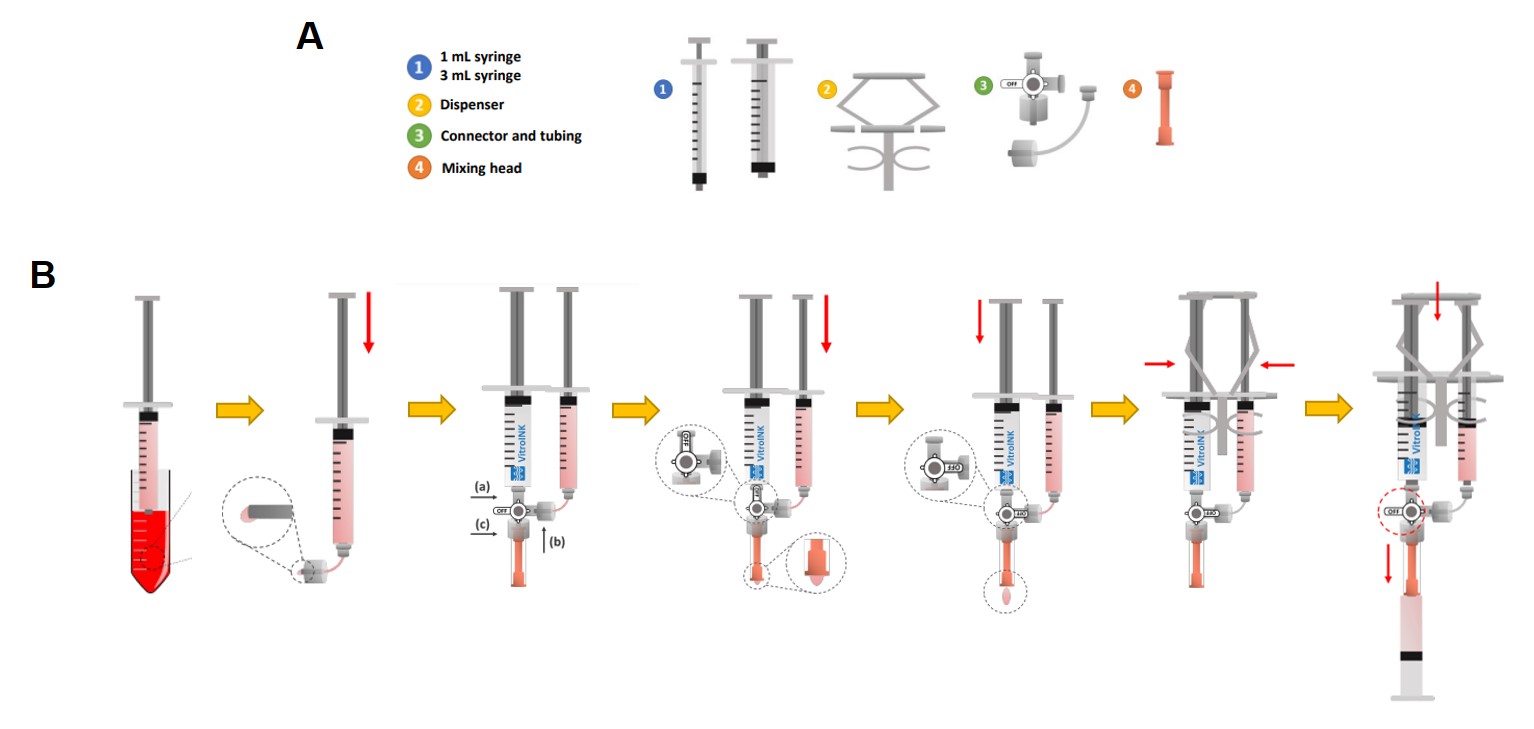
Fig 1. Mixing kit components (A) and steps (B) required for the mixing of VitroINKs® with either cell media or cell suspension for the production of cell-free or cell-laden scaffolds, respectively.
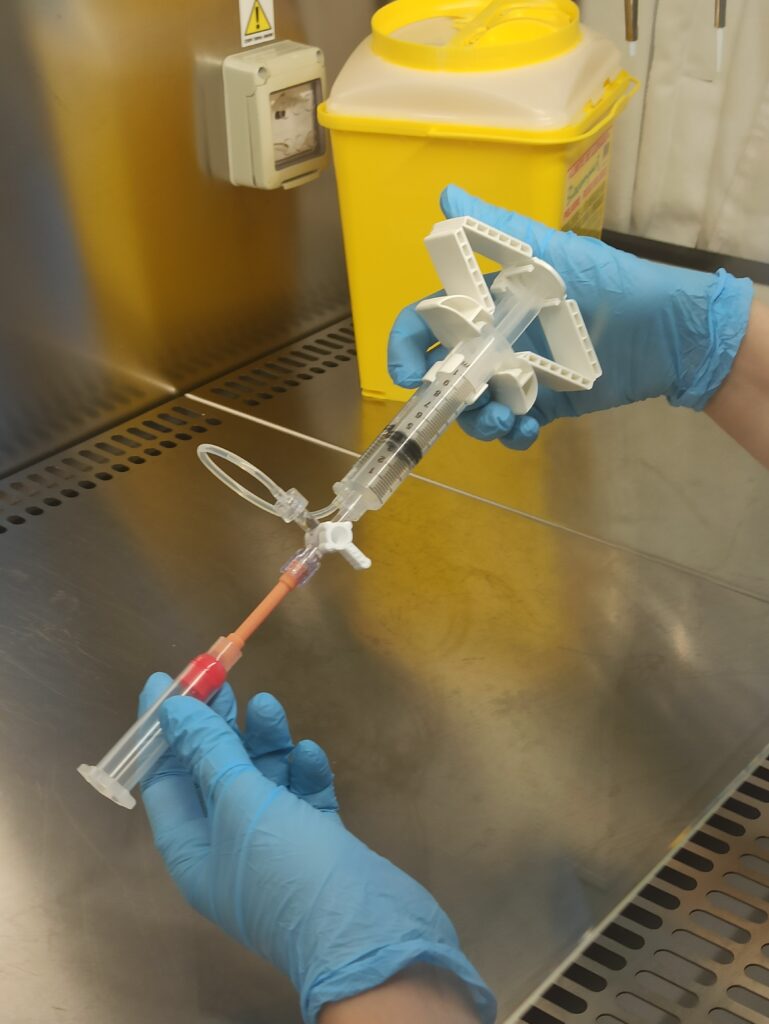
Fig. 2. VitroINK® 3D loading into the bioprinting syringe
3D printing of cell-free VitroINK® 3D scaffolds:
- Switch on the REG4Life bioprinter, connect it to the PC and launch the REGEMAT 3D Designer Software. Then click the “Connect” button
- Connect the printing syringe to a 25G ID conical dispensing tip and load it in the printhead
- Specify the header configuration and calibrate the printhead to be used. To that end, press Settings > Header configuration and select the tool Syringe 5 cc in the corresponding printhead allocation (T1). Click calibration button and wait for the calibration to be completed. Press “Accept” and then do a Homing by clicking the XYWZ button in the “Movements” tab
- Ensure that the glass bed is installed on the printing platform and then proceed with the laser calibration by choosing the corresponding tool/printhead in “Header Configuration” and by clicking “Calibration” in the REGEMAT 3D Designer Software.
- Remove the glass bed, insert the 100 mm diameter cell culture dish into its adaptor and then secure it on the printing platform
- Configure the printing bed by pressing Settings > Platform configuration. Then select “Petri dish”, and indicate its diameter. Press “Accept”.
- Adjust the distance between the tip of the syringe and the surface of the printing bed to approx. 0.30 mm by clicking “Header Configuration” and T1 “Fine Calibration”. Press “Accept” and then do a Homing by clicking the XYWZ button in the “Movements” tab
- Specify T1 nozzle diameter (0.25 mm) in the “Tool configuration” section within the “Object viewer” tab. Then, load the .stl file to be printed. In this case, two cylinders with the following object configurations were used:
Object configuration – scaffold A
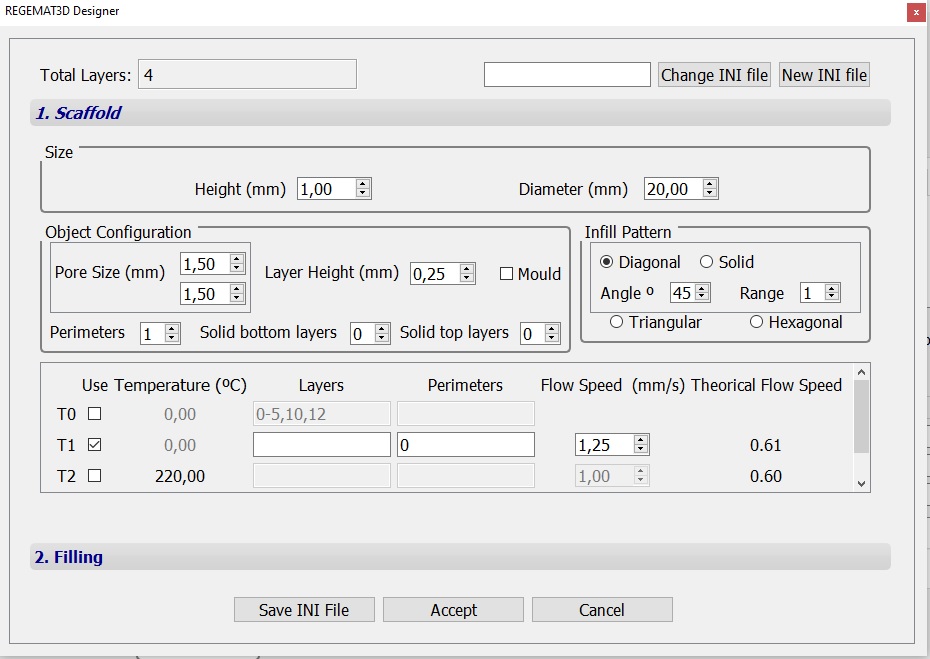
Object configuration – scaffold B
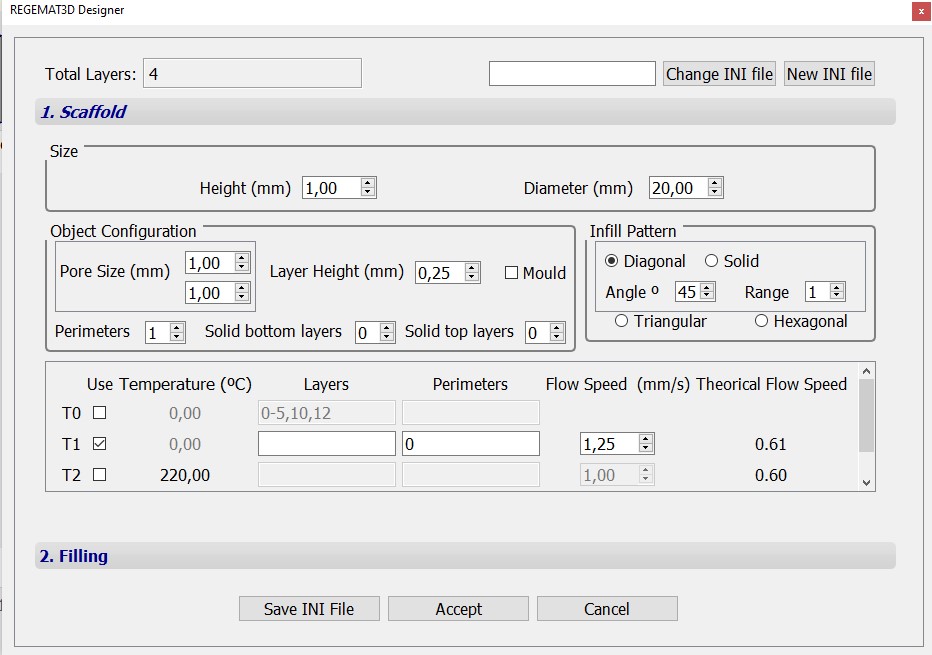
Fig. 3. Configurations of cylindrical scaffolds with 1 x 20 mm (h x d) dimensions and 45º diagonal infill patterns with pore sizes of 1.5 mm (object A) and 1 mm (object B)
- The following printing parameters can be used in Settings > Extra configuration to produce scaffolds with the desired shape and resolution.
Extra configuration
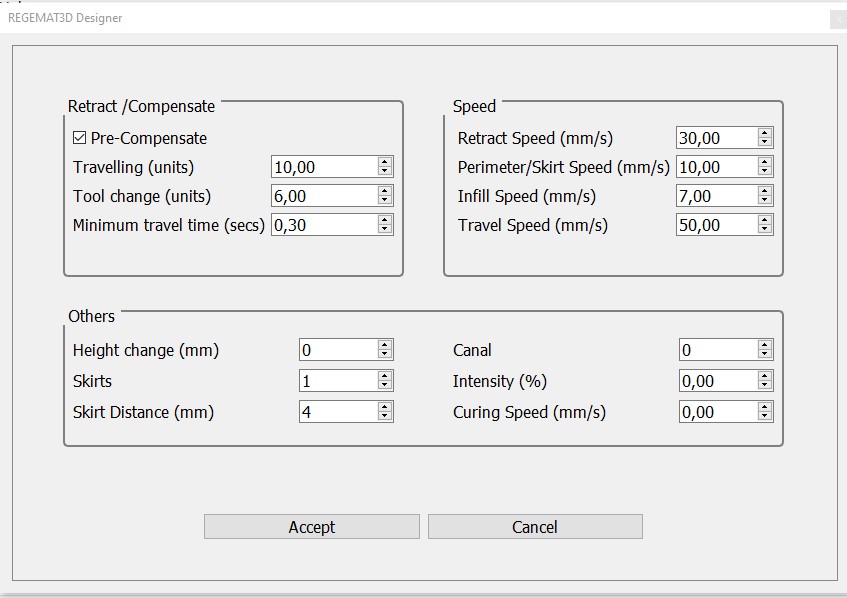
Fig. 4. Extra configuration for objects A and B.
- Select “Printable Object” to generate the G-code and then clicking “Start Print button”.
Printable object
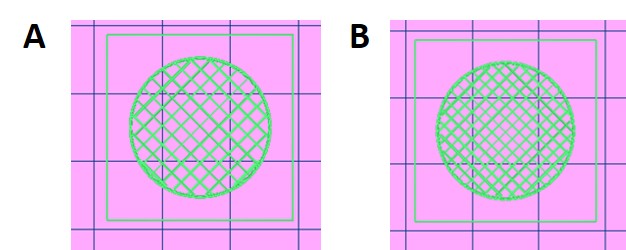
Fig. 5. Printable objects A and B.
- Once the scaffolds have been produced, fill the petri dish with culture media and leave in the cell culture incubator at 37ºC with 5% CO2-balanced atmospheric air.NOTE: This protocol can be followed in order to produce scaffolds with embedded cells. In that case, cell culture must be replaced by a cell suspension at concentrations ranging between 1·106-1·107 cells/ml.
RESULTS
The adjusted 3D printing parameters enable the fabrication of cell-free VitroINK® 3D scaffolds with the desired shape and resolution. The rheological properties of the hydrogel ensure the extrudability of the ink through the 0.25 mm ID nozzle with the employed parameters, with no signs of clogging during the entire procedure and ensure a high-shape fidelity and after printing (Fig. 6).
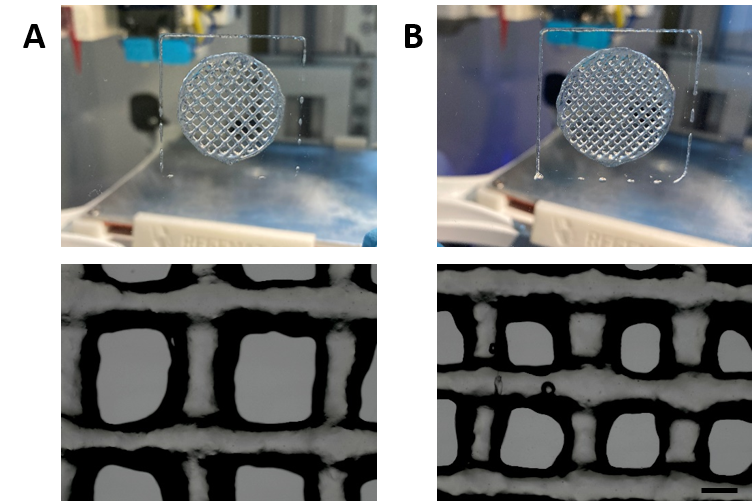
Fig. 6. Macroscopic and microscopic images of scaffolds A and B after printing, depicting the high resolution and shape fidelity achieved by this manufacturing technique.
The pore diameter was measured in the microscopic images to obtain quantitative data about the printing resolution, finding that:
- For the theoretical 1.5 mm diameter pore size, the experimental pore size was 1.136 mm ± 81.67 (SE), n=3.
- For the theoretical 1 mm diameter pore size, the experimental pore size was 673.3 ± 27.72 (SE), n=3.
Examples on the tissue engineering applications of VitroINKs® are listed on the reference section.
REFERENCES
- Gebeyehu A, Surapaneni SK, Huang J, Mondal A, Wang VZ, Haruna NF, Badge A, Arthur P, Kutlehria, Patel N, Rishi AK, Singh M. Polysaccharide hydrogel based 3D printed tumor models for chemotherapeutic drug screening. Sci Rep 2021; 11:372.
| Number | Category | Product | Amount |
|---|
8 thoughts on “Protocol for the fabrication of VitroINK 3D xeno-free scaffolds through mechanical extrusion-based 3D printing”