
Introduction
FlexdymTM is a block co-polymer belonging to the styrene-ethylene-butylene-styrene (SEBS) family of thermoplastic elastomers which is specifically tailored for the fabrication of microfluidic devices and flexible scaffolds for biomedical applications. The elastomeric nature enables its deformation even at high tensile strengths without fracture, making this material a suitable candidate for the engineering of either cell-free or cell-laden scaffolds that will be exposed to constant mechanical stresses.
As per the fabrication of microfluidic devices, FlexdymTM is a great alternative to polydimethylsiloxane (PDMS) because it has higher hydrophilic stability and more resistance to adsorption of small particles such as drugs or growth factors. At the same time, it shares some key features with PDMS: it is certified biocompatible (ISO 10993 parts 4, 5, 6, 10 & 11) and USP Class VI); it is optically transparent and it behaves as a soft elastomer.
The following method describes the 3D printing of porous scaffolds through fusion deposition modelling (FDM) using FlexdymTM pellets as a starting material.
Materials
Reagents and consumables
- FlexdymTM pellets
- Spatula
Equipment required
- REGEMAT 3D Bio V1 or REG4Life bioprinters equipped with pellet extruder
- PC with REGEMAT 3D Designer Software
- Optical microscope
Methods
- Turn on the REG4Life bioprinter, connect it to the PC and launch the REGEMAT 3D R4L Designer Software. Then click the “Connect” button.
- Specify the header configuration and calibrate the printhead to be used. To that end, press Settings > Header configuration and select the tool Pellet extruder in the corresponding printhead allocation (T2). Click calibration button and wait for the calibration to be completed. Afterwards, do a Fine Calibration by positioning the nozzle at a distance of 0.3 mm from the printing platform. Press “Accept” and then do a Homing by clicking the XYWZ button in the “Movements” tab.
- Configure the printing bed by pressing Settings > Platform configuration. Then select “Glass bed”, tick the temperature box and set the value to 60ºC. Press “Accept”.
- Load FlexdymTM pellets and heat the pellet extruder by ticking T2 and selecting 230ºC in the “Movements” tab. Once heated to the target temperature, move the T2 slide-bar upwards in order to extrude a small amount of material.
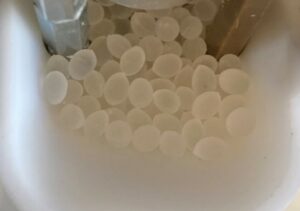 Fig. 1. FlexdymTM pellets in the pellet extruder
 - Specify T2 nozzle diameter (0.4 mm) and temperature (230ºC) in the “Tool configuration” section within the “Object viewer” tab. Then, load the .stl file to be printed. In this method, cubes with same dimensions and different pore sizes (object A –0.5 mm pore size– and object B –1 mm pore size-) were created:
Object A
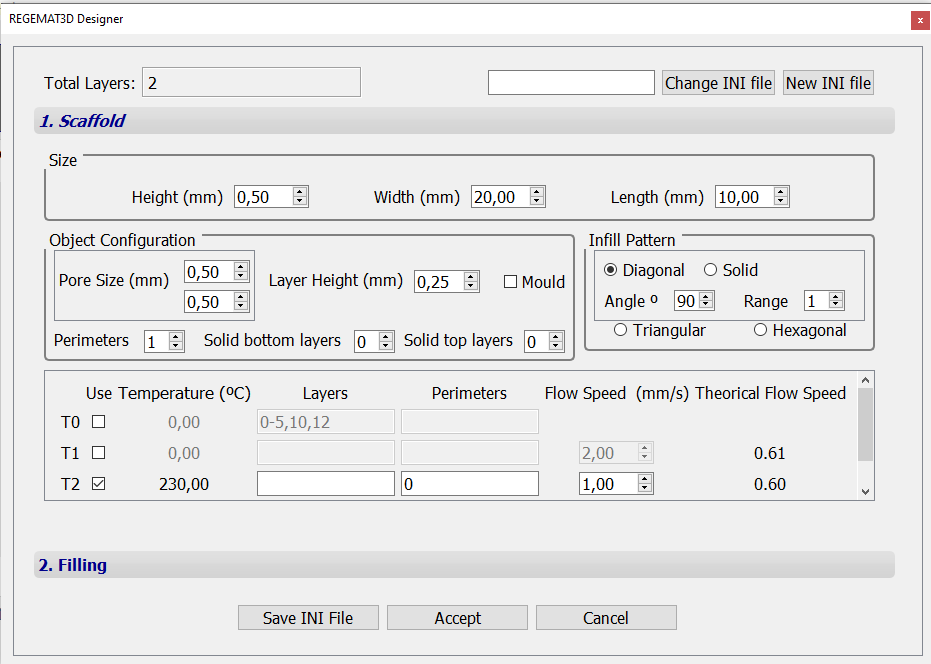
Object B
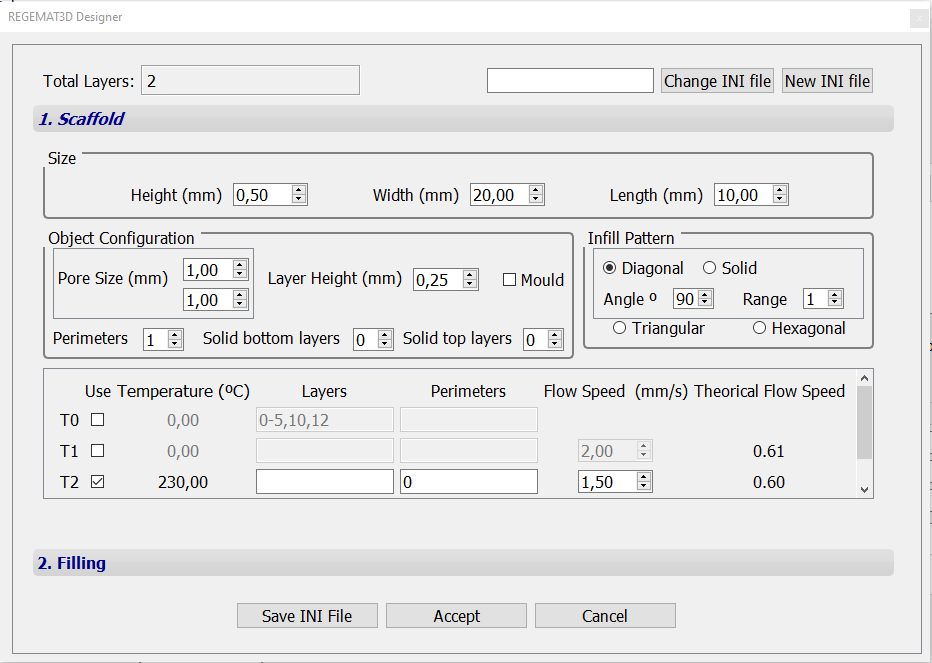
Fig. 2. Configuration of objects A and B.
6. The following parameters can be used in Settings > Extra configuration to produce scaffolds with the desired shape and resolution:
Fig. 3. Extra configuration for objects A and B.
7. Select “Printable Object” to generate the G-code and clic “Start Print button” for generating the scaffold.
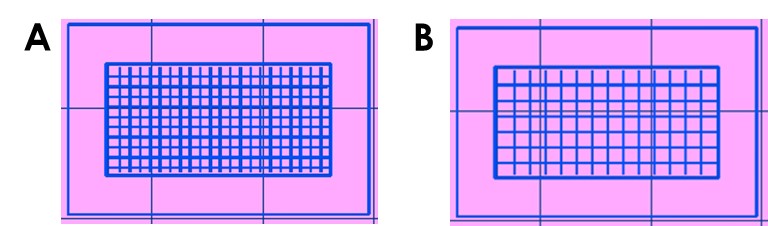
Fig. 4. Printable objects A and B.
8. Let the scaffold cool down and remove it from the glass bed with a spatula.
Results
The size of FlexdymTM pellets is compatible with the pellet extruder of REGEMAT 3D’s bioprinting systems; the movement of the screw supports the uniform material supply from the inlet to the nozzle opening and its melting by heating up, thus ensuring the reliable printing of scaffolds with high quality.
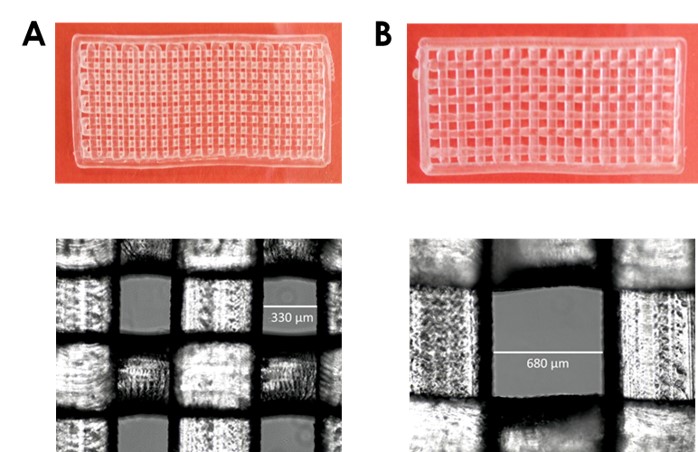
Fig. 5. Macroscopic and microscopic images of scaffolds A and B after printing, depicting the high resolution and shape fidelity achieved by this manufacturing technique.
To promote adherence of the scaffold to the printing bed it was necessary to heat up the printing platform to 60ºC. Switching off the layer fan is also advisable to improve the adherence between the printing layers.
Conclusions
The use of materials in pellet format rather than in filament format presents a series of advantages in 3D printing, including higher flexibility of material selection, high cost-effectiveness and faster printing times that improve the sustainability of the manufacturing process. In addition, it avoids common problems during the fabrication process when using highly flexible filaments, which are related to the deformation of the filament inside the extruder that serves as a heat barrier.
Despite this method only gives a proof-of-concept for the fabrication of scaffolds, it opens doors for the automated production of organ-on-a-chip devices using additive manufacturing techniques with FlexdymTM pellets, thus avoiding the use of: 1) PDMS; and 2) complex and time-consuming multi-step manufacturing processes of organ-on-a-chip devices based on direct or indirect methods via replica molding, such as soft lithography, which additionally require access to clean room facilities with specialized equipment.
| Number | Category | Product | Amount |
|---|
11 thoughts on “3D printing of highly flexible scaffolds using Flexdym”