
INTRODUCTION
Working in sterile conditions is key for culturing our scaffolds in aseptic conditions and avoiding contamination. In a 3D Bioprinting protocol we have many sources of contamination, the biomaterial, the cells itself or the 3D bioprinting protocol.
The scaffolds with or without cells have the same requirements in order to work in aseptic conditions. In order to avoid contamination in the 3D bioprinting protocol, we need to work carefully and inside a biological cabinet.
The protocol describes the equipment, the materials, and the steps required for successfully 3D bioprint our scaffolds in sterile conditions while working with our REG4Life 3D Bioprinter (REGEMAT3D S.L.).
MATERIALS AND EQUIPMENT
- REG4Life 3D Bioprinter (REGEMAT3D S.L.)
- 100 class biological cabinet (REGEMAT3D S.L.)
- Class II cabinet additional if required for cell or biomaterial preparation
- Petri dish adapter for the REG4Life (REGEMAT3D S.L.)
- Autoclave
- Fine forceps sterile
- Petri Dish 60 mm diameter
- 5 cc bioprinting syringe sterile or similar (REGEMAT3D S.L.)
- 5 cc red adjustment piston sterile or similar (REGEMAT3D S.L.)
- Conical or metallic dispensing tips sterile (REGEMAT3D S.L.)
- Twist-on tip caps sterile (REGEMAT3D S.L.)
- Ethanol 70% (prepare it with sterile autoclaved distilled water)
METHODS
The protocol requires previous steps to be sure of working in sterile conditions. Preparing the material and equipment disposition description is provided, and the step by step protocol when starting the 3D Bioprinting process inside a biological cabinet class 100 or class II. This protocol requires access to the REG4Life 3D bioprinter, so the fully closed biological cabinets (class III cabinets or “glove box”) are not appropriate.
A. Material and equipment disposition
- By using autoclavable bags for surgical material sterilization, autoclave the 5 cc bioprinting syringe, the dispensing tips and the forceps (figure 1).
- Submerge for 24 h in a sterile 50 mL tube with Ethanol 70% prepared as described above the 5 cc red adjustment piston sterile or similar.
- Inside a biological cabinet and with sterile forceps transfer them inside a sterile petri dish and leave the piston air-dry inside the biological cabinet. Keep the piston in a sterile petri dish sealed with parafilm for further uses and move only using sterile forceps.
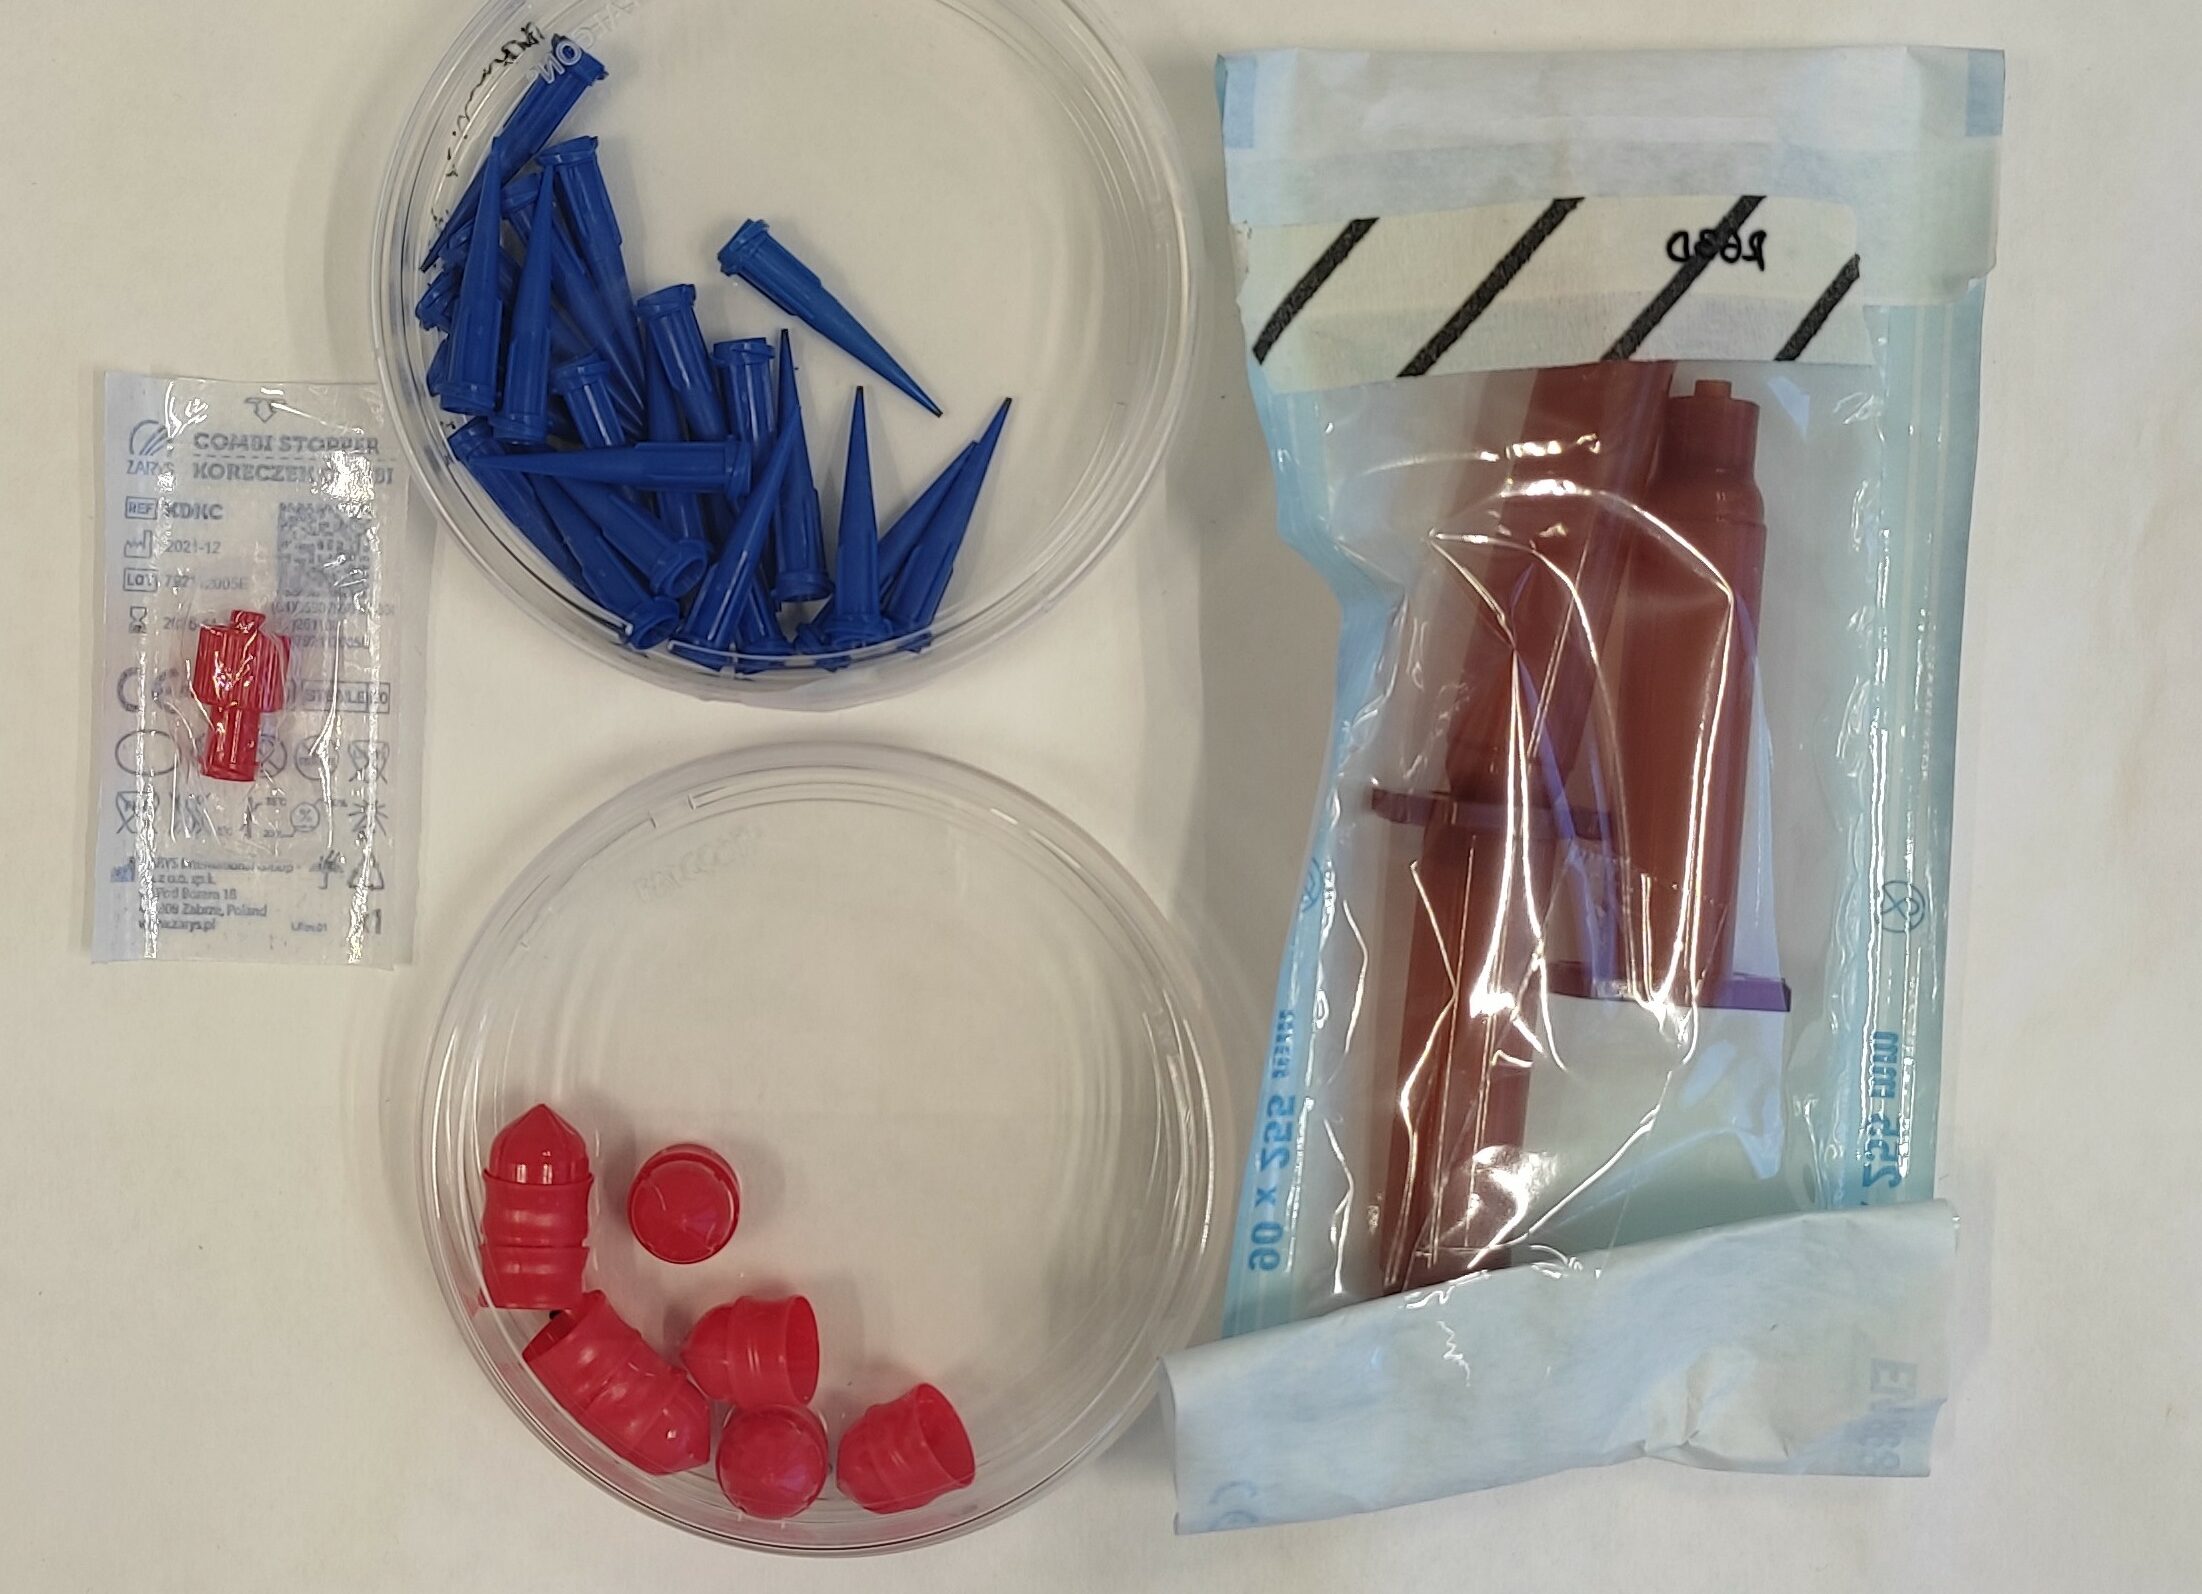
Figure 1. Consumables sterile used in the process of sterile 3D bioprinting protocol with the REG4Life and the 100 class biological cabinet.
B. Setting the 100 class cabinet with the REG4Life setting of the 100 class cabinet before working
- Switch on the biosafety cabinet with the REG4Life 3D Bioprinter inside, and without the fan, switch on the UV lamp installed in the cabinet for 15-20 minutes (figure 2).
- After the sterilization, switch off the UV lamp and switch on the fan function and the visible light for working.
- Sterilize the surface with Ethanol 70% and a tissue, and keep the glass frontal panel around half of the position or lower (figure 3).

Figure 2. UV lamp of the 100 class biological cabinet with the REG4Life 3D bioprinter.
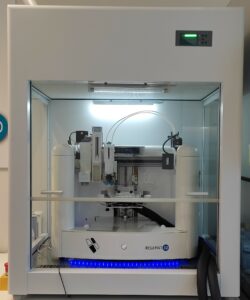
Figure 3. REG4Life D bioprinter inside a 100 class biological cabinet with visible light and fan, and the glass frontal panel half way ready for working in aseptic conditions.
C. Workplace disposal and materials preparation inside a biological cabinet
- Prepare the biomaterial in aseptic conditions, if it is lyophilized, resuspend it with appropriate volume of sterile medium as recommended by the manufacturer inside the biological cabinet.
- If the syringe is not pre charged, open the sterile syringes prepared (A) and close the end with the twist-on tip caps sterile provided.
- Charge the syringe avoiding bubbles formation and with the sterile forceps add the sterile piston prepared in A.2. Carefully, remove the twist-on tip and remove all the air and bubbles from the syringe until being ready for extrusion. Put on the twist-on tip and transfer the syringe to the REG4Life carefully.
- Inside the cabinet, and with the syringe on the corresponding tool, take off the twist-on cap and without touching the end of the conical or metallic dispensing tips sterile, put the dispensing tip to the charged syringe. If you touch the end of the dispensing tip, change it to another one.
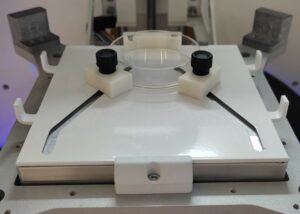
Figure 4. Sterile petri dish in the petri dish holder of the REG4Life 3D bioprinter ready for fine calibration.
D. Aseptic working protocol with the REG4Life 3D bioprinter inside a biological safety cabinet
- Once we have our syringe ready, we need a sterile petri dish for extruding the material and cleaning the disposal tip if we have clogging.
- Work all time with the glass frontal panel on half or lower position to keep a good laminar air flow. Use gloves all time and spray with ethanol 70% all the material before entering into the 100 class cabinet. Spray your gloves as well when working inside the cabinet.
- Perform the calibration of the tools required or the process being careful not to touch the glass bed. If that happens, change the disposal tip and start the calibration again.
- For the fine calibration, use a new sterile petri dish, so in case the dispensing tip touches the plate, you don’t need to change it again (figure 4).
- When the fine calibration is done, we are ready to start printing our scaffolds in an aseptic environment.
- For all the process, use a sterile petri dish and work in the clean area where the clean air from the HEPA filter of the 100 class cabinet arrives.
- When finishing the extrusion of the scaffold, put the lid to the petri dish, add the culturing conditions as required for the experiment and dispose of a new sterile petri dish.
- Before starting the next scaffold, clean the disposal tip of residual material and purge some material by using a new sterile petri dish (figure 5 and 6).
- Repeat the process until having all the scaffolds printed and keep the scaffolds in sterile conditions.
- If your syringe is not empty, remove the syringe from the tool, remove the dispensal tip and put a new twist-on cap. Add parafilm to the syringe in both parts and keep it in the storage conditions recommended by the manufacturer (figure 7).
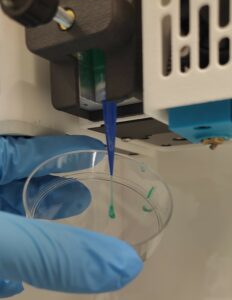
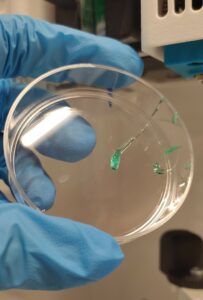
Figure 5 and 6. The extrusion process in sterile conditions by using a petri dish for clean the dispensal tip and extrude clogged material.

Figure 7. The syringe can be stored with the material (without cells) by using the twist-on cap and sealing the syringe end with a parafilm strip. Don’t leave the dispensal tip as it can be a source of clogging and contamination for further experiments.
NOTE: remember to use the standard Personal Protective Equipment (PPE) regulated for working in a cell culture facility or as required by the experimental conditions if the laboratory is qualified as Biosecurity level 3 or 4 (BSL-3/4). The protocol described here is for a BSL-2 as the main cell culture facilities, but you should adapt the PPE to your personal requirements by consulting with the Health and Safety Department.
| Number | Category | Product | Amount |
|---|